
Introduction
Microcurrent facials were once exclusive to high-end spas and dermatology clinics. Today, at-home microcurrent devices have made it possible to get professional-grade results from your bathroom counter. But owning the device is only half the equation. Knowing the proper procedure when using a microcurrent device—especially how to use microcurrent facial device correctly—is what separates people who see real, lasting results from those who end up with an expensive gadget collecting dust. This guide walks you through everything — from understanding how the technology works to mastering the exact technique, step by step.
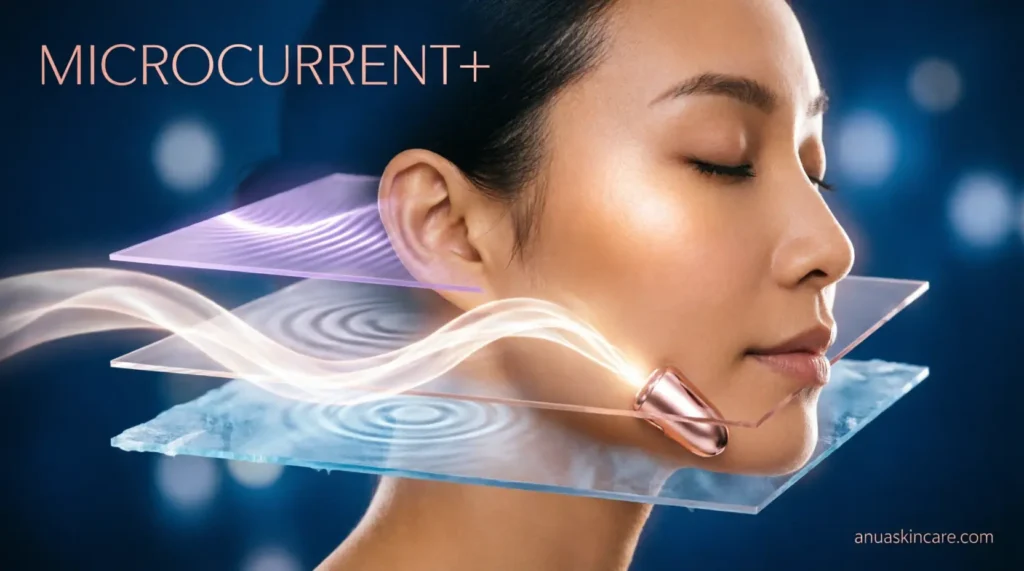
What a Microcurrent Device Actually Does to Your Skin
Microcurrent therapy delivers low-level electrical currents that closely mimic the body’s own bioelectric signals. These currents work beneath the surface of the skin to stimulate the facial muscles, encouraging them to contract and re-educate, much like a workout does for the rest of your body.
The technology is not new. Microcurrent was originally developed in clinical settings to treat muscle paralysis in conditions like Bell’s Palsy. It was later adopted in aesthetic medicine for its ability to produce visible lifting and toning effects. What changed is the delivery — devices are now compact, safe, and designed for consistent home use.
When used correctly and consistently, microcurrent can:
- Improve facial muscle tone and definition
- Lift the jawline and cheek area over time
- Soften the appearance of fine lines
- Improve circulation, giving skin a healthier glow
- Enhance the absorption of skincare products applied after treatment
The results are cumulative. Unlike some skincare tools that offer one-and-done claims, microcurrent rewards consistency above everything else.
Who Should and Should Not Use a Microcurrent Facial Device

Before diving into technique, it is worth knowing whether microcurrent is appropriate for you. This technology is widely considered safe for most adults, but there are clear contraindications.
You should avoid microcurrent devices if you:
- Have a pacemaker or any implanted electrical device
- Are pregnant
- Have epilepsy or a history of seizures
- Have active skin infections, open wounds, or severe acne in the treatment area
- Have recently had Botox or dermal fillers (wait at least two weeks)
- Have metal pins, plates, or implants in the face or neck area
If you have any underlying health conditions or are unsure, consult a dermatologist before beginning.
Everything You Need Before Your First Session
Knowing how to use a microcurrent facial device properly starts before you even turn it on. Your preparation directly affects how effective each session will be.
Choosing the Right Device
Not all microcurrent devices are created equal. Here is a quick comparison of three of the most popular options on the market:
| Device | Intensity Levels | Companion App | Best For |
|---|---|---|---|
| NuFACE Trinity | 3 levels + Booster | Yes | Full-face lifting, experienced users |
| NuFACE Mini | 3 levels | Yes | Targeted use, beginners, travel |
| Solawave Wand | Multi-mode | No | Beginners, added heat and massage |
Each device comes with its own activator gel and a guided app, which makes learning how to use a microcurrent facial device significantly easier for first-timers.
What You Need for Every Session
- Your microcurrent device (fully charged)
- The brand’s recommended activator gel (not a substitute)
- A clean face
- A small brush for gel application (optional but recommended)
- Your post-treatment skincare routine ready to go
The Proper Procedure When Using a Microcurrent Device

This is the core of the process. Follow each step in order for the best possible outcome.
Step One: Cleanse Thoroughly
Start with a gentle cleanser and remove every trace of makeup, sunscreen, oil, and product residue. Any barrier on the skin — even lightweight facial oils — can interfere with the current’s ability to penetrate and travel effectively. Pat your face completely dry before moving forward.
Step Two: Apply the Activator Gel
This step is non-negotiable. The gel acts as a conductor for the electrical current. Without it, the device cannot transmit current smoothly or safely. You may feel an uncomfortable zapping sensation if you attempt to use the device without sufficient gel, and more importantly, the treatment simply will not work as intended.
A few important points about the gel:
- Use only the gel designed for your specific device or the brand’s recommended alternative
- Other serums, even water-based ones, do not conduct microcurrent in the same way
- Water-based, oil-free serums can be applied to the skin before the activator gel
- Oil-based products must be saved for after the session, as oil blocks current flow
- Apply the gel in sections just before treating each area to prevent it from drying out
Step Three: Power On and Select Your Intensity
Most devices offer three intensity settings. Start low if you are new to microcurrent, and work your way up as your skin adjusts.
- Low: Recommended for the first two to four weeks of use and for sensitive skin types
- Medium: A solid daily-use setting once you have accustomed your skin to the current
- High: For experienced users who want maximum stimulation
Many devices also include a booster or enhanced mode that increases the depth of current delivery. Use this mode with each session once you are comfortable on the medium or high setting.
Step Four: Treat the Jawline and Cheek Area
This region responds particularly well to microcurrent and is where many people notice the most visible lifting.
Gliding technique (repeat each move three times per side):
- Place both spheres of the device against the lower cheek and upper jaw
- Glide slowly upward toward the cheekbone and wait for the device to beep
- Move to the mid-cheek area and repeat the upward glide
- Move to the upper cheek near the lower eye area and glide upward
The key is to move slowly and deliberately from start point to end point. Rushing the stroke reduces the effectiveness of the current delivery.
Holding technique:
- Lay the device flat against the lower cheekbone closest to the mouth
- Gently lift the skin and hold completely still until the device beeps
- Move laterally toward the ear and repeat
- Move to the center of the cheekbone, lift gently, and hold
- Shift toward the temple and hold
- Reposition between the cheekbone and jawline, lift, and hold
- Move to the upper cheekbone area, lift, and hold
Step Five: Treat the Forehead
Divide the forehead into two halves and work one side at a time. Repeat each sequence three times before switching to the opposite side.
- Start at the center of the forehead and glide upward toward the hairline, waiting for the beep
- Move slightly outward and repeat the upward glide
- Continue moving toward the hairline, gliding upward with each pass
Apply fresh gel as needed throughout this section. The forehead covers a larger surface area and the gel can dry out before you complete all passes.
Step Six: Post-Treatment Skincare
Rinse off the activator gel with lukewarm water. Some people prefer to leave it on, but washing it off allows you to apply your full skincare routine to clean skin and reduces the chance of sensitivity.
Follow up with:
- A vitamin C serum in the morning, or a peptide serum in the evening
- Your regular moisturizer
- SPF during daytime sessions
Microcurrent temporarily increases circulation and opens the skin’s ability to absorb products, so the serums you apply immediately after a session are likely working harder than usual.
Common Mistakes That Reduce Your Results

Even people who use their device daily can unknowingly undermine their results. These are the most frequent errors and how to correct them.
Moving Too Quickly
The most common mistake is treating the device like a wand you wave quickly across the face. The current needs time to stimulate the muscle fibers underneath. Move at a pace that allows you to travel from start point to end point just as the beep sounds.
Skipping or Substituting the Gel
Replacing the activator gel with a regular serum is one of the biggest misunderstandings in microcurrent use. Conductivity is not the same across all formulas. Some serums may provide a partial conductor effect, but they cannot replicate what a purpose-built activator gel does. The investment in your device deserves the right support.
Inconsistent Sessions
Microcurrent is not a one-session fix. The muscles of the face, like any muscle group, require repeated stimulation to tone and lift. Missing sessions occasionally is not a problem, but going weeks without use can set back visible progress noticeably.
Pressing Too Hard
The device works through electrical current, not physical pressure. Pressing too firmly does not improve the treatment and can cause unnecessary skin irritation or drag.
Using it Over Active Breakouts
Avoid running the device over inflamed acne lesions. The current can spread bacteria and worsen inflammation. Work around active breakouts and treat the surrounding areas only.
How Often Should You Use a Microcurrent Device
The frequency of use makes a significant difference, especially in the beginning.
- Weeks one through twelve: Four to five sessions per week
- After three months: Two to three sessions per week for maintenance
- Long-term: Many users drop to three times per week and maintain their results with no issue
Morning use is popular because microcurrent provides an immediate, temporary lift that lasts several hours — long enough to notice a difference throughout the day. Evening use works equally well for those who prefer to incorporate it into a nighttime routine.
Each full-face session typically takes fifteen to twenty minutes once you are familiar with the steps.
How Long Before You See Results
This is the question most people have but few articles answer directly. Here is a realistic timeline:
- After the first session: A subtle, temporary lift that fades within a few hours
- After two to four weeks of consistent use: Slightly more defined contours and improved skin tone
- After three months: Noticeable improvement in jawline definition, cheek lift, and reduction in the appearance of fine lines
- After six months: Cumulative results that are more stable and longer-lasting
Results vary depending on age, skin condition, consistency of use, and the overall quality of your skincare routine. Lifestyle factors — sleep, hydration, diet, and stress — also play a meaningful role in how the skin responds.
Combining Microcurrent With Other Skincare Devices
Many skincare enthusiasts use multiple devices as part of their routine. Knowing the right order prevents interference between treatments.
- Use microcurrent before red LED light therapy, not after. LED is a good follow-up that complements the lifting work of microcurrent
- Do not use microcurrent on the same day as at-home radiofrequency treatments
- Avoid combining microcurrent with chemical exfoliants like AHAs or BHAs on the same day, as freshly exfoliated skin can be more reactive to current
- Gua sha or facial massage tools can be used after microcurrent as part of your post-session routine
Frequently Asked Questions
What happens if I feel tingling or a zapping sensation during the treatment?
This typically means you need more gel. Reapply a generous layer to the area you are treating and continue. Tingling can also occur if the device is moved too quickly, leaving the current without a consistent pathway.
Can I use microcurrent around my eyes?
Yes, but with care. Use the device along the brow bone and upper cheekbone near the eye area. Avoid placing the device directly on the eyelid or too close to the eye itself.
Can I use my microcurrent device every single day?
Daily use is generally fine and some brands recommend it during the initial loading phase. Over time, three to five sessions per week is more than sufficient to maintain results.
Is microcurrent safe for all skin tones?
Yes. Unlike certain laser or light-based devices that carry risks for deeper skin tones, microcurrent works through electrical stimulation rather than light energy and is considered safe across all skin tones and types.
Do I need to charge the device before every session?
Check your device’s battery level before each session. A low battery can reduce the current output, making the treatment less effective than it should be.
Can I use microcurrent if I have Botox or fillers?
Wait a minimum of two weeks after any injectable treatment before resuming microcurrent. The current can potentially interfere with how the product settles in the treatment area.
What if I miss several sessions in a row?
Pick up where you left off without worrying about starting over completely. The muscle memory built during consistent use does not vanish immediately. Resume your normal frequency and results will return.
The Bottom Line
Microcurrent remains one of the few at-home beauty technologies with a genuinely strong scientific foundation and a track record that holds up under scrutiny. The key is in the execution. Knowing how to use a microcurrent facial device correctly — the right prep, the right gel, the right technique, and the right frequency — is what separates real results from disappointment.
The routine does ask something of you: patience, consistency, and a willingness to learn the steps rather than rush through them. But for those who commit, the payoff is visible. A sharper jawline, lifted cheeks, and improved skin texture are not reserved for spa clients or people with surgeon’s appointments. They are available to anyone who shows up for their skin, day after day, with a device in hand and the right knowledge behind it.